Skill Level:
Crafting Time:
Technique(s):
Material(s):
Category:
Share This Craft
Search Crafts
Christmas Finger Puppets

If you are looking for gift ideas for teachers, parents, or kids, make these adorable finger puppets. Pair the puppets with a storybook to make story time more interactive at home or at school. These cuties can even be added to gifts for friends without children for some extra holiday cheer. Slip a puppet over a pen, a utensil, or a chocolate dipped spoon. Pair it with cocoa mix (homemade or single-serve packets) and a pretty mug, and you’ve made a memorable, edible, and lasting gift.
Supplies & Tools:
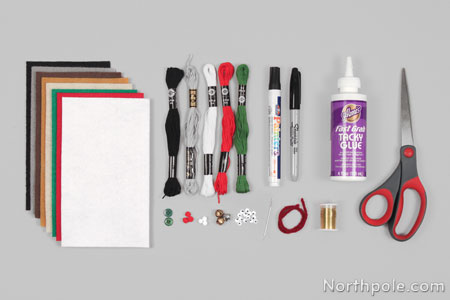
- Printable template (download here)
- Felt: red, white, green, brown, black, grey, gold, ivory
- Marker
- Scissors
- Wiggly eyes
- Tacky glue
- Embroidery needle
- Embroidery floss: red, white, black, green, grey
- Black paint pen
- Mini red pompom
- Mini white pompom
- Miniature bells
- Red yarn
- 26 or 30 gauge wire
- Small buttons
- Optional: mini hot glue gun & glue sticks
Basic Directions:
- Decide which characters you want to make.
- Print template and cut out pieces.
- Lay pattern pieces on felt (color appropriate) and lightly trace with a marker.
- Cut out felt pieces.
- Before you glue anything, arrange pieces together as a trial run. See below for more details for each character.
- Once you are comfortable with the layout of the pieces, begin gluing them down to the front body piece. (If you prefer to sew all the pieces, you may do so.)
- Let glue dry. (We didn’t wait for glue to dry completely since we were eager to complete each puppet. The advantage to this is that it is faster and easier to sew since the glue hasn’t hardened. The disadvantage is that the pieces might shift since the glue has not set, which can potentially make the puppet messy if the glue gets smeared.)
- Stack front and back body pieces together.
- Sew along outer edge, but be sure to leave the bottom edges open.
- To finish sewing and hide the knot, feed the thread inside the puppet and trim. For more details on this technique, see this article.
Perry the Penguin
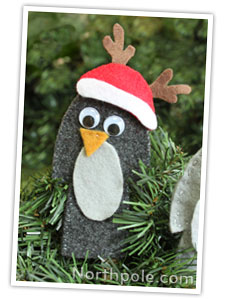
- To make the body, sew or glue belly and beak onto one of the body pieces. Glue wiggly eyes and let dry.
- Stack body pieces together.
- Sew around the outside, leaving bottom edges open.
- To make the hat, glue H2 on the bottom edge of H1. Let dry.
- Glue antlers onto H3. Let dry.
- Stack H1 on H3.
- Sew along top arc, leaving bottom edges open.
- Place hat on Perry.
- Turn Perry over and sew hat to the back of his head.
Bart the Polar Bear
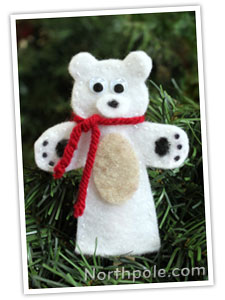
- On one body piece, glue on wiggly eyes, snout, and belly.
- Draw nose and paws with black paint marker.
- Stack body pieces together.
- Sew around edges, leaving bottom edges open.
- Cut a piece of red yarn that is 5" long.
- Tie yarn around Bart’s neck. Now he has a scarf!
- Turn Bart over and glue a white pompom for a tail. Let glue dry completely.
Reindeer
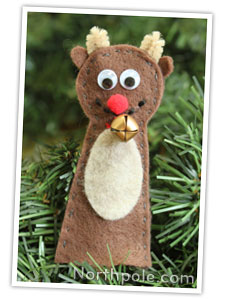
- Sew a mouth on R1 with black embroidery thread or draw a line with a black paint marker.
- Glue wiggly eyes, and a mini pompom for the nose.
- Glue or sew belly in the middle of R1.
- Sew a miniature bell above the belly, if desired. Let glue dry.
- Glue antlers onto R2; let dry.
- Stack R1 on R2 and sew around the outside edges, leaving bottom edges open.
Gingerbread Man
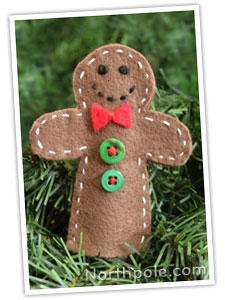
- On one body piece, sew bow tie and buttons.
- Use black paint marker to draw eyes and mouth OR use embroidery thread to sew the mouth and eyes.
- Stack body pieces together and sew around the outside edges, leaving bottom edges open.
Note: Use white embroidery thread to sew the outside edge to look like frosting.
Candy Cane
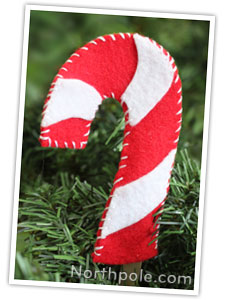
- Glue white stripes onto one candy can piece. Let dry.
- Stack both candy cane pieces together.
- Sew around outside edge, leaving bottom edges open. (It’s ok to sew the white pieces as you sew the outside edge.)
Mrs. Claus
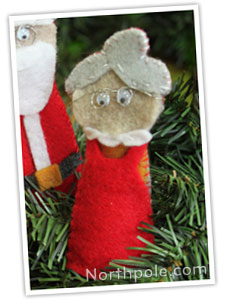
- Take one body piece and begin adding features.
- First glue the face.
- Glue wiggly eyes and let dry.
- Cut a piece of wire that is 4 inches long. Twist wire in loops to form glasses.
- Wrap glasses around Mrs. Claus’s head and use hot glue to secure in place OR sew in place.
- Glue hair.
- Place apron on Mrs. Claus. Sew along bottom edge.
Note: We did not sew the entire apron at one time, so that there aren’t too many stitches on the sides of the puppet - Place collar on Mrs. Claus, it should slightly overlay the straps of her apron. Sew in place. As you are sewing, sew the apron straps.
- Stack the body pieces together, and sew along the outer edges, keeping the bottom edges open. (We used red thread to sew the lower portion, and grey to sew the upper portion.)
Santa Claus
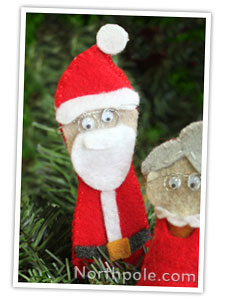
- Take one body piece and begin adding features.
- First glue the face.
- Glue wiggly eyes. Let dry.
- Cut a piece of wire that is 4 inches long. Twist wire in loops to form glasses.
- Wrap glasses around Santa’s head and use hot glue to secure in place OR sew in place.
- Glue beard and mustache.
- Glue jacket trim.
- Glue belt.
- Glue belt buckle.
- Glue hat trim.
- Glue hat pompom.
- Stack the body pieces together, and sew along the outer edges, keeping the bottom edges open.
Grouchy Claus
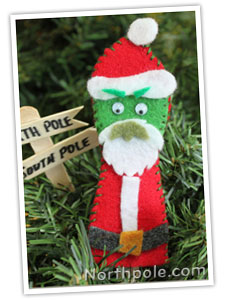
- Follow the instructions to Santa Claus (above) except make the following substitutions:
- Change the face color to green.
- Change mustache to green and cut a jagged edge.
- Cut a jagged edge in the beard to make it look scruffy.
- Cut green eyebrows.
- Sew with green thread to complete Grouchy Claus.


