Skill Level:
Crafting Time:
Technique(s):
Material(s):
Category:
Tag(s):
Share This Craft
Search Crafts
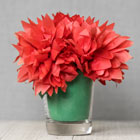
Paper Bauble Ornaments

These fun baubles are cute as a stand-alone ornament and very pretty when strung together to create garland. Use a circle punch to make tree ornaments or use the printable template to make oversized ornaments to hang up in your house. Continue reading to learn how to make these easy and inexpensive ornaments
Supplies & Tools:

- Decorative cardstock, at least 2 prints
- Circle paper punch, any size
- Thin ribbon, 1/8" wide
- Hot glue gun & glue sticks
- Doll needle
Directions:
- Using the circle punch, punch out 5–7 circles from cardstock.
- Fold each circle in half, colored side facing in.
- Using the hot glue gun, apply a small amount of glue on backside of fold and immediately press another circle.

- Continue adding circles to the bauble, being careful not to get hot glue in the center. Otherwise it may be difficult to add ribbon.

- After adding desired amount of circles, glue the outer two folds together, forming the sphere shape.
- Cut a piece of ribbon about 10" long.
- Thread the needle with ribbon.
- Pass the needle through the center cavity of bauble.

- Make a loop and pass it back through the bauble.

- Tie a knot at the bottom of the bauble to secure the ribbon in place.
- Tie a knot at the top of the bauble.

Elfy Hint:
- You can also add more circles to make the baubles look fuller.
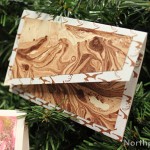
Oversized Ornament Decorations

Supplies & Tools:
- Printable template (download here)
- Decorative cardstock
- Pencil
- Scissors
- Rubber cement
- String or fishing line
- One-hole punch
- Ruler
- Bone folder
Directions:
- Print the template and cut out desired shape.
- Trace the shape seven times on unprinted side of paper.
- Cut out shapes.
- Lay shapes on a flat surface, unprinted side facing up. Using a straightedge and a bone folder, score a line (from top to bottom) through the middle of each shape.
- Fold each shape in half, printed side facing in.
- Using rubber cement, apply glue to the unprinted side of fold and press onto the tab of another shape. Be sure to align the shapes.
Note: If using 2 colors of paper, be sure to alternate colors as you glue the shapes together. - Continue adding shapes to the bauble.
- After all shapes have been added, glue remaining two flaps together, forming the 3D ornament.
- Near the top of the ornament, punch a hole. Cut a piece of string to desired length and tie to the ornament.
- Hang wherever you like!